
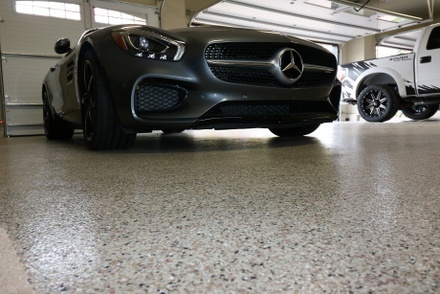
Epoxy flooring looks very nice, is bulletproof, and is also easy to maintain. You can choose a handful of colors, patterns, and designs that give your garage a nice makeover. If you’re a DIY person, you might be thinking of a little epoxy garage floor project of your own.
For first-timers, learning the basics of installing a solid or metallic epoxy flooring garage isn’t hard. A video here and there could spark ideas and encouragement. Of course, there are finer details to deal with once you get started, and more questions need to be addressed. You learn more as you get more experience with epoxy floors.
To give you the big picture, let’s talk about the basic steps on coating your garage floor with epoxy, so you don’t miss the most important parts.
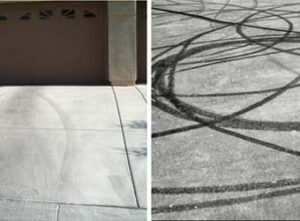
 Before you apply an epoxy coating to your garage floor, you will need to clean it up. You can spot degrease areas that have grease or oil build-ups. A good way to find these areas is to pour water on the garage floor, as water will pull up on top of grease or oil. This also helps you determine if the concrete floor has some type of sealer, as epoxy will not adhere to sealed concrete and it needs to removed mechanically by grinding the surface.
- Pour degreaser into greased areas and brush the oil and dirt off. Don’t worry about the degreaser washing off your driveway. Most degreasers are biodegradable products and should be safe environmentally.
- After degreasing, while the floor is still damp, you need to treat the floor with acid. This is called “acid etching.” The acid will react with the concrete surface, creating a texture that’s good for epoxy adhesion. One bottle of acid to 2 gallons of water should be a good ratio. It’s best to use a plastic sprinkling can to spray the garage floor with acid. Do not use metal containers, as acid reacts with metal.
- Once done, wash the floor with water to clean out dirt and other materials left. The acid has reacted to concrete turning into salt, much like acid reacting to a base compound. So don’t worry about it washing off into your driveways. They are now neutralized and safe environmentally.
- If you have a wet vac, use it to dry the floor and completely remove tiny salt particles that the acid has left behind. The floor should be completely dry before applying epoxy.
- Now it’s time to mix the epoxy materials. It composes of part A and part B. Mixed the 2 parts together and mix very well. Use power mixer if possible. Before applying the epoxy on the floor, get a fresh bucket and pour the mixed epoxy into it. This is important as you don’t want soft spots on the epoxy layer. Scrape out as much as you can. Now mix again for another 1 minute.
- After mixing wait for 30 minutes. Now you’re ready to pour the epoxy. Be careful not to mix too much epoxy, as it’s pot life is only for 2 to 2.5 hours.
- Cover the roller tray with a garbage back to make cleaning easier afterward. Pour epoxy onto the tray and use a roller to spread epoxy on the garage floor just like you spread paint. Work on the edges first. Work from inside the garage and work your way to the garage door. Let dry for 1 day.
- Next day apply 2nd coating using the same method. After spreading out the epoxy, and while the epoxy is still wet, sprinkle color flakes for good adhesion. Color flakes add a nice look and texture plus it hides imperfections on the floor. Wait for another day, and you have a very nice little garage flooring epoxy.
 Before you apply an epoxy coating to your garage floor, you will need to clean it up. You can spot degrease areas that have grease or oil build-ups. A good way to find these areas is to pour water on the garage floor, as water will pull up on top of grease or oil. This also helps you determine if the concrete floor has some type of sealer, as epoxy will not adhere to sealed concrete and it needs to removed mechanically by grinding the surface.
If you take more time to prepare and research, you can have a successful little epoxy flooring project that you can be proud of. Not only does it add beauty to your garage but also increases your home’s value in a very cost-efficient fashion..

